
BLOGS · GAME BLOGS
PUBLISHED
READING4 min
Setting up the RPCS3 emulator for God of War 3
A guide to configuring RPCS3 for God of War 3. We cover optimal versions, CPU/GPU settings, and crucial patches. Expect long loading times and potential bugs as the game is still a work in progress.
Thanks to the diligent work and titanic efforts of the RPCS3 developers, one of the PlayStation 3's best exclusives recently became almost "playable." If you've got a fast multicore CPU, you can finally experience God of War 3 on the emulator.
First and most importantly, make sure your copy of God of War 3 is version 1.03 — it's the only one suitable for proper emulation.
Second, and equally crucial, ensure your emulator version is at least RPCS3 v0.0.12-10820 Alpha | HEAD (main branch). Update it if needed. If you're running a much newer version, some of these specific settings might be redundant; try launching the game without any extra tweaks first. Conversely, it's possible these settings might prevent the game from even starting on a newer build. If that's the case, drop a comment, and I'll update this guide ASAP.
Third: currently, God of War 3 can take an extremely long time to load after launching on RPCS3. Don't be surprised if it gets stuck on a black screen after the Santa Monica logo. The developers say this is normal behavior for RPCS3 right now and is practically impossible to fix, so you'll have to get used to it. These loading times can last 5-10 minutes.
Keep in mind that this title still hasn't achieved "Playable" status. So, there's no guarantee you'll finish the game without hitting a critical bug.
 ⤢ ВІДКРИТИ
You can download the latest version of the emulator from the official developer website.
Now, let's dive into the settings.
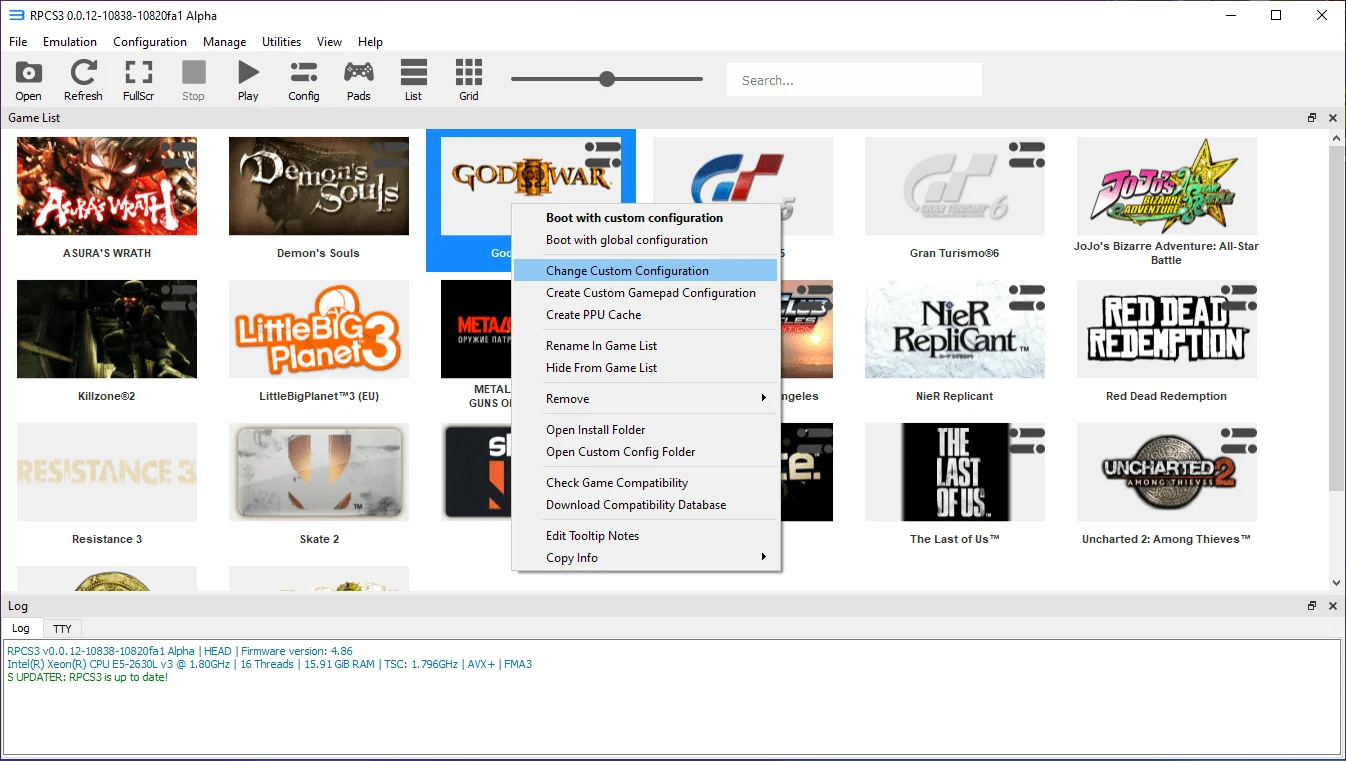
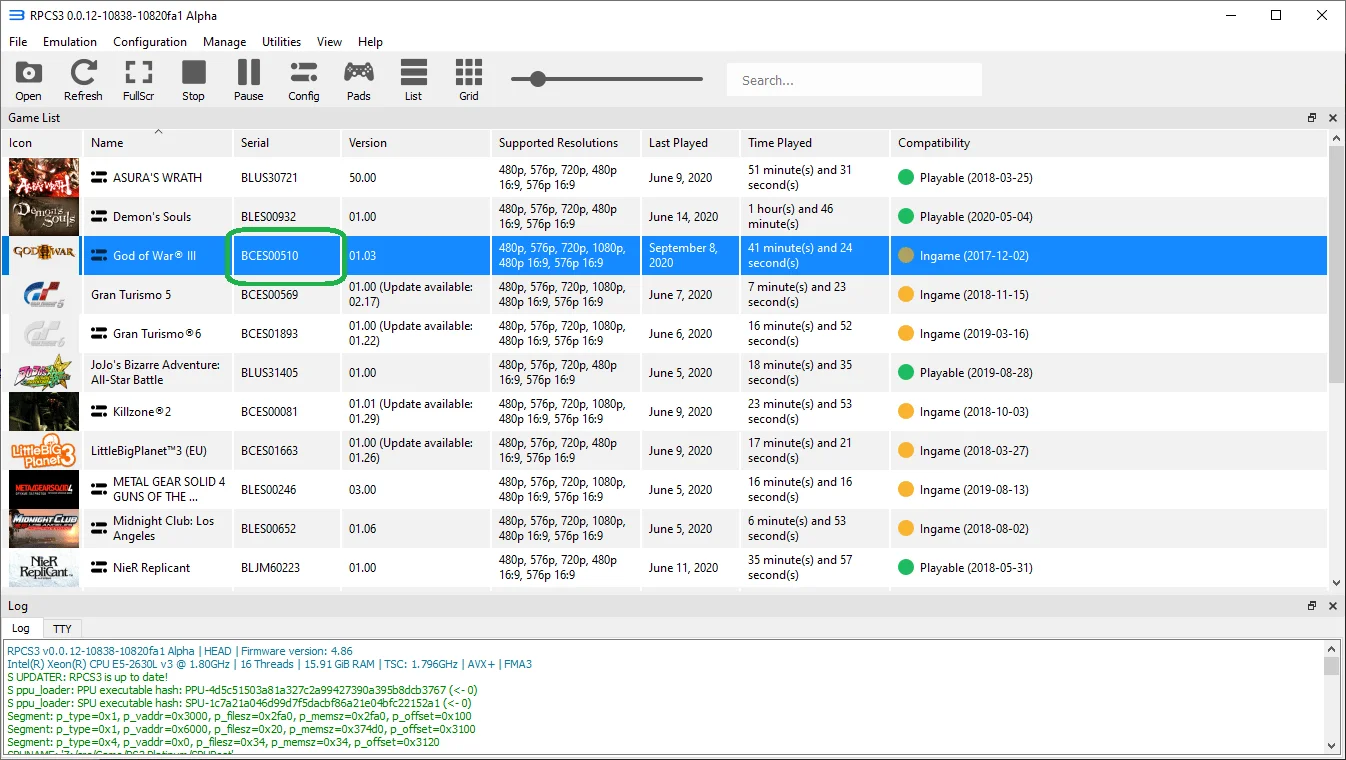
Launch the emulator and right-click on the "God of War 3" icon, then select «Change Custom Configuration»:
 ⤢ ВІДКРИТИ
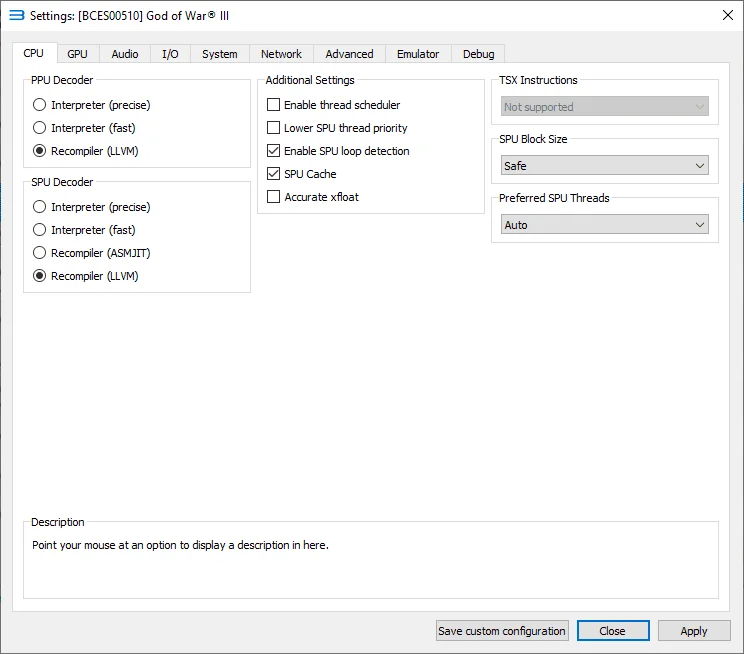
With the latest emulator versions, you generally don't need to tweak much in the "CPU" tab. However, if you're on an older CPU or experiencing loading issues, switching the "SPU Block Size" parameter from "Safe" to "Mega"" might offer a slight boost in performance and stability. If you're running an AMD Ryzen chip, you should enable the "Enable thread scheduler" setting and experiment with changing "SPU Block Size" from "Safe" to "Mega"" as well.
Unfortunately, we don't have an AMD Ryzen CPU available right now, so I can't offer detailed setup advice for them.
 ⤢ ВІДКРИТИ
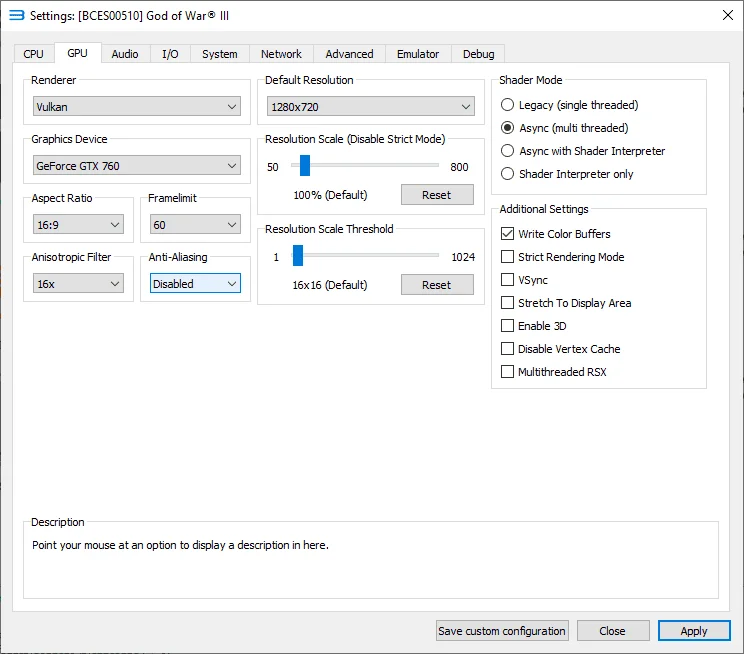
Next, head to the «GPU» tab. Change the «Renderer» parameter from «OpenGL» to «Vulkan». Set "Framelimit" from "Auto" to "60", «Anisotropic filter" from "Auto" to "16", disable "Anti-Aliasing" and critically, check the box for «Write Color Buffers»:
 ⤢ ВІДКРИТИ
Then go to the "Advanced" tab and move the "Driver Wake-Up Delay" slider to "100" (this might add stability and reduce crashes, but it could also cause issues — revert to the default value if something goes wrong after changing it):
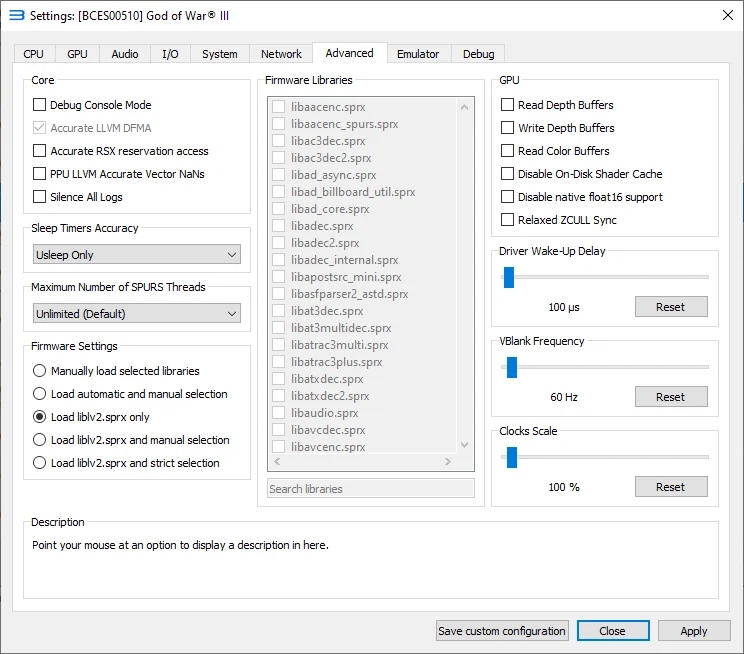 ⤢ ВІДКРИТИ
That covers the main settings. Now, let's activate the patch that disables MLAA anti-aliasing processing on the CPU. You can learn how to install patches on RPCS3 in our dedicated article; here, we'll just focus on activating it.
If you don't have the new patch yet, you can download it from our server:
patch1.3Download
In the emulator's top menu, select «Manage» then «Game Patches»:
 ⤢ ВІДКРИТИ
Next, determine which disc version applies to you (BCES00510 is the most common):
 ⤢ ВІДКРИТИ
Expand it and check the two boxes next to "Disable MLAA" and "Disable SPU MLAA":
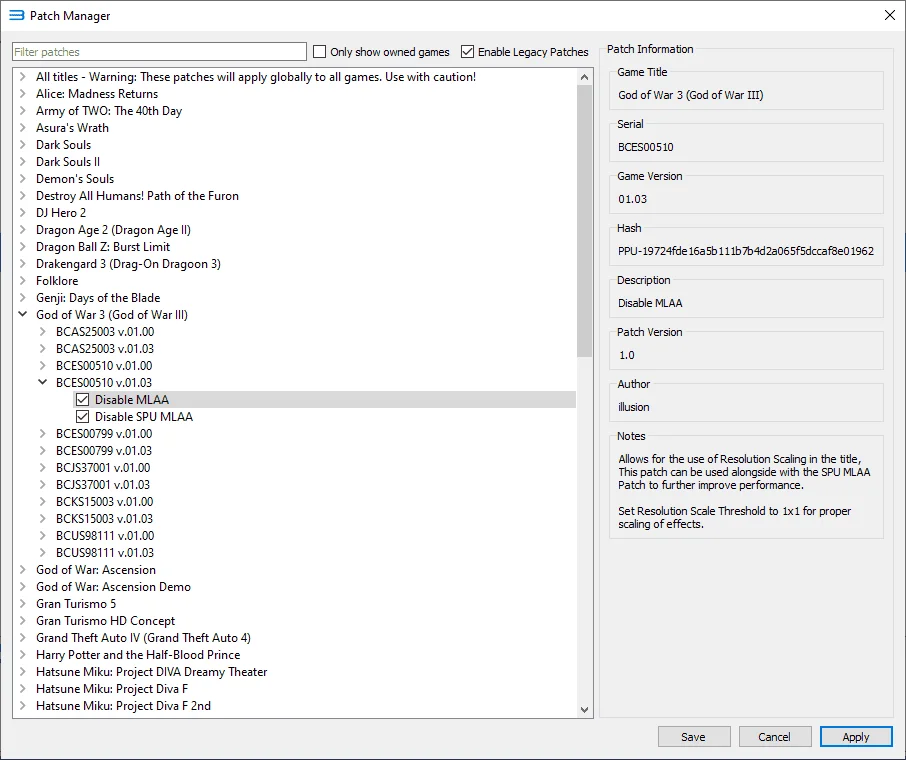 ⤢ ВІДКРИТИ
If you're unsure, just expand all available God of War 3 disc versions and check both the "Disable MLAA" and "Disable SPU MLAA" options for each. It won't hurt anything.
That's it for setting up God of War 3 on the RPCS3 emulator. If you have powerful enough hardware (like a Core i7-8700K/Ryzen 7 3700X or even better: Core i9-9900K/Core i7-10700K/Ryzen 7 3800X), you can expect 30-45 frames per second:
Test these settings and share your results in the comments. Feel free to ask any questions you have, too.
I'm also planning some hardware testing within RPCS3. If you're interested in detailed CPU benchmark results for this game's emulation, let me know your thoughts in the comments below.
Thanks for reading, and happy emulating!