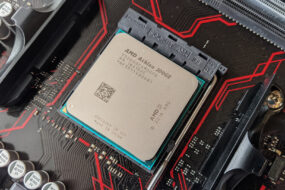
Relatively recently, I got my hands on an old kit consisting of a pretty good ASUS M2N-E motherboard and an AMD Athlon 64 X2 4800+ processor. After that, I was immediately struck by the idea of writing a blog about overclocking this CPU and subsequent materials related to chips for the AM2 platform.
But this kit had other thoughts about its future: The motherboard started up, reached the initialization of devices, and immediately turned off. Unfortunately, at that time, I did not have another AM2 compatible processor on hand and I could not fully test the motherboard. And in general, frankly speaking, the last thing you think about is a chip malfunction. But to my surprise, this was one of those cases.
After checking all sorts of voltages with a tester, I got a little discouraged; everything was in perfect order, but the board still turned off after the devices were initialized and did not allow entering the BIOS.
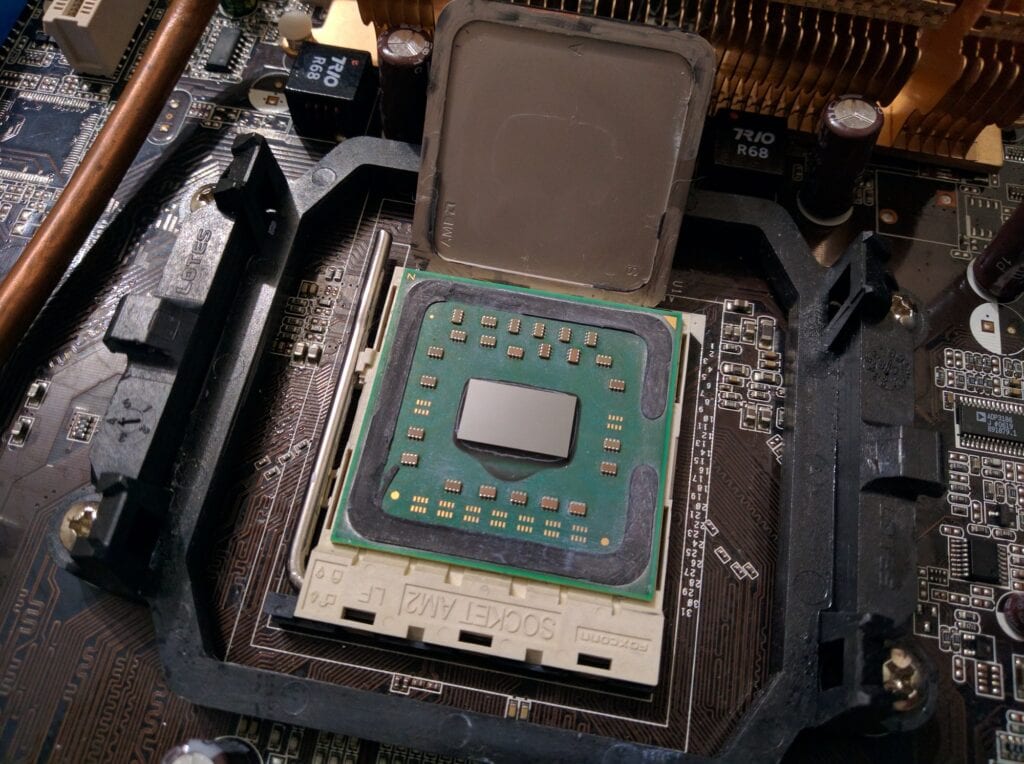
So, I will not torment you with my idiotic investigation and will briefly describe the further steps: after another “brilliant” decision to flash the BIOS, I finally decided to turn my attention to the processor, or rather to the fact that its lid practically did not get warm during a short system operation. I decided to scalp the chip and examine its insides.
A simple blade, broken in half, and my maximum concentration and caution went into action. Five minutes later, the heat-outputting cover was separated from the substrate. Unfortunately, due to my stupidity, I did not take a photo of what was under it at that moment, but you can take my word for it – the brownish stone thermal paste looked creepy.
This is the reason for the frequent shutdowns of the system: the processor just went into protection so as not to damage its crystal with high temperatures.
Below is a photo of the cleaned processor and with thermal paste smeared on top of the crystal:
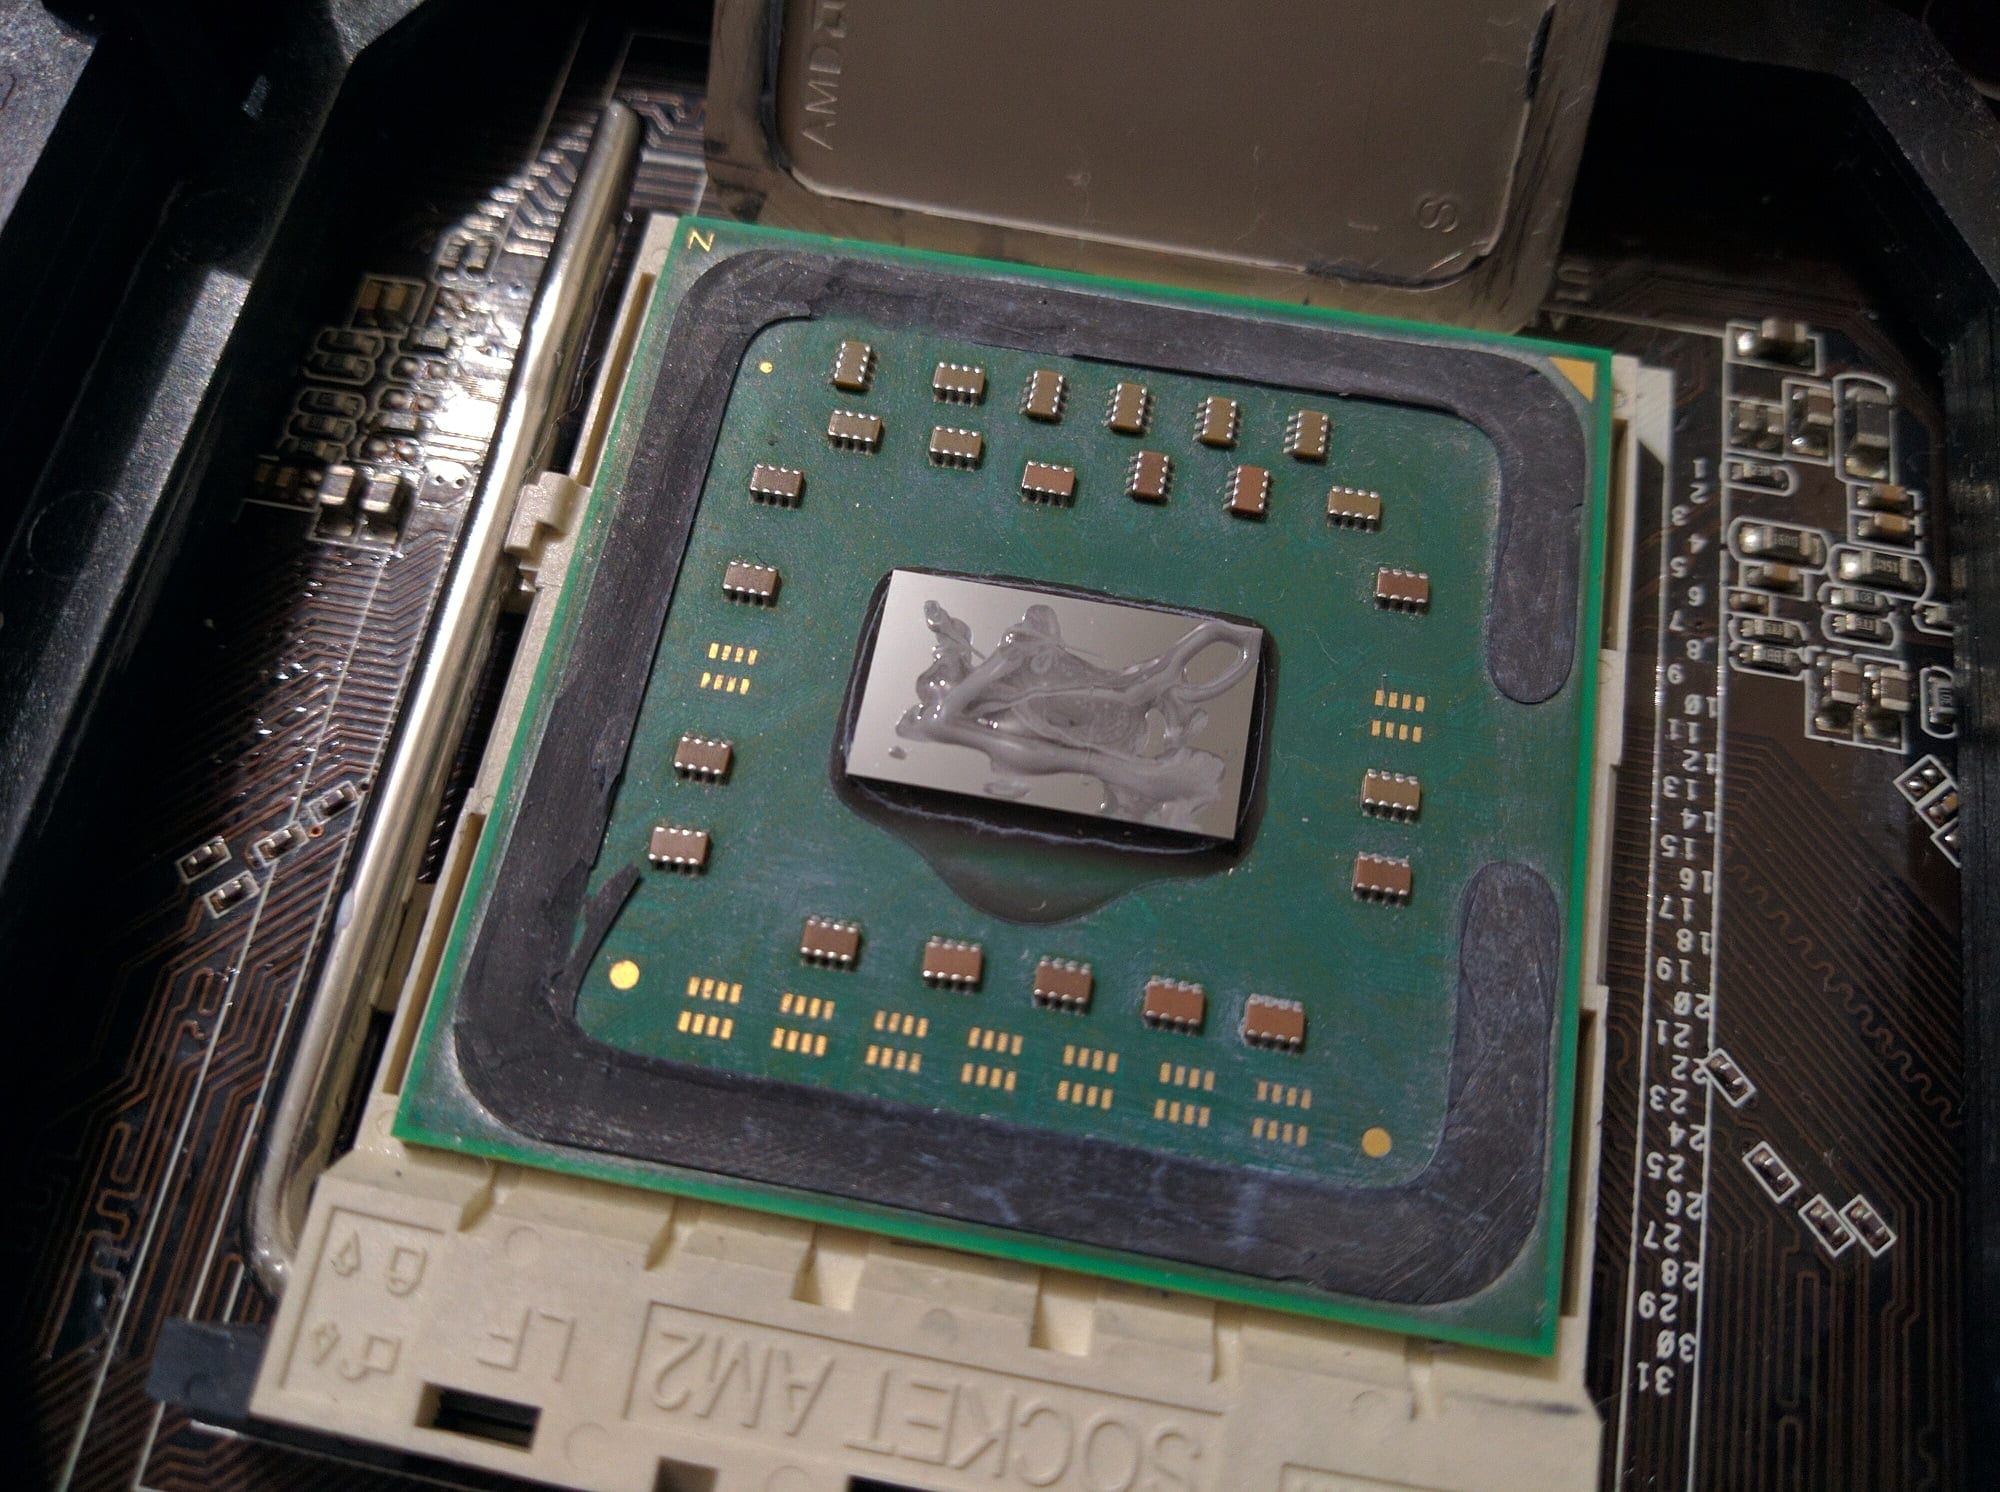
After changing the thermal paste under the CPU cover, the system started up and quietly loaded the operating system. Moreover, I passed the basic set of stress tests without any problems, which made me incredibly happy.
Let’s finally move on from a lengthy introduction to an overview of technical specifications and directly to the overclocking.
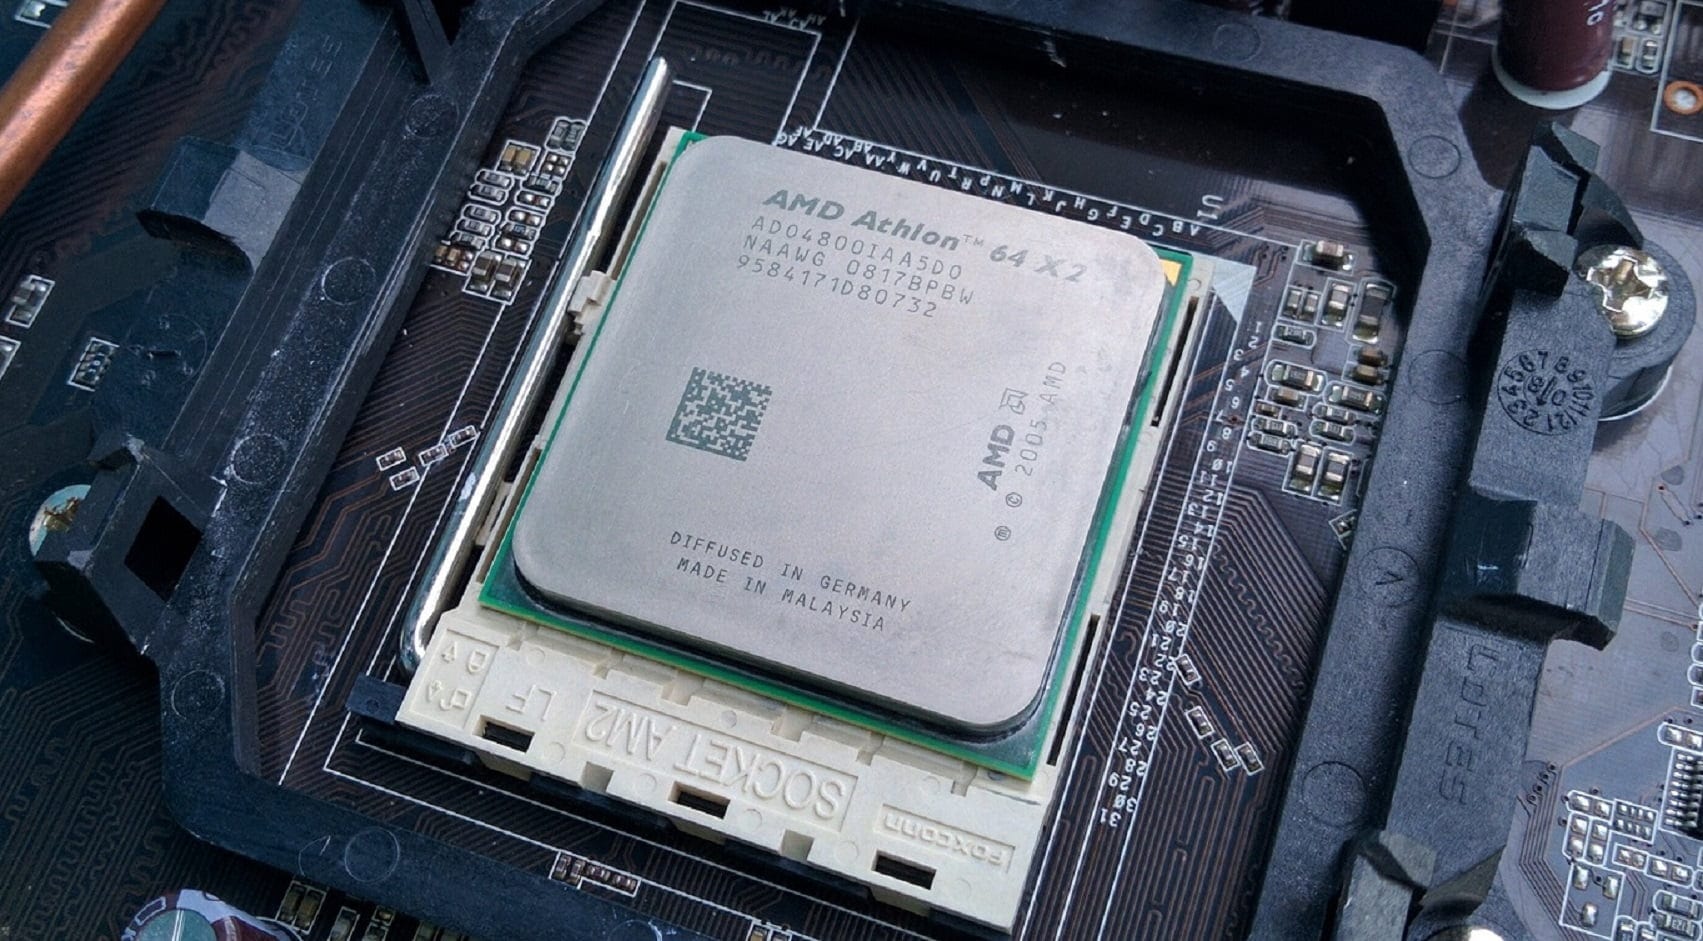
Processor
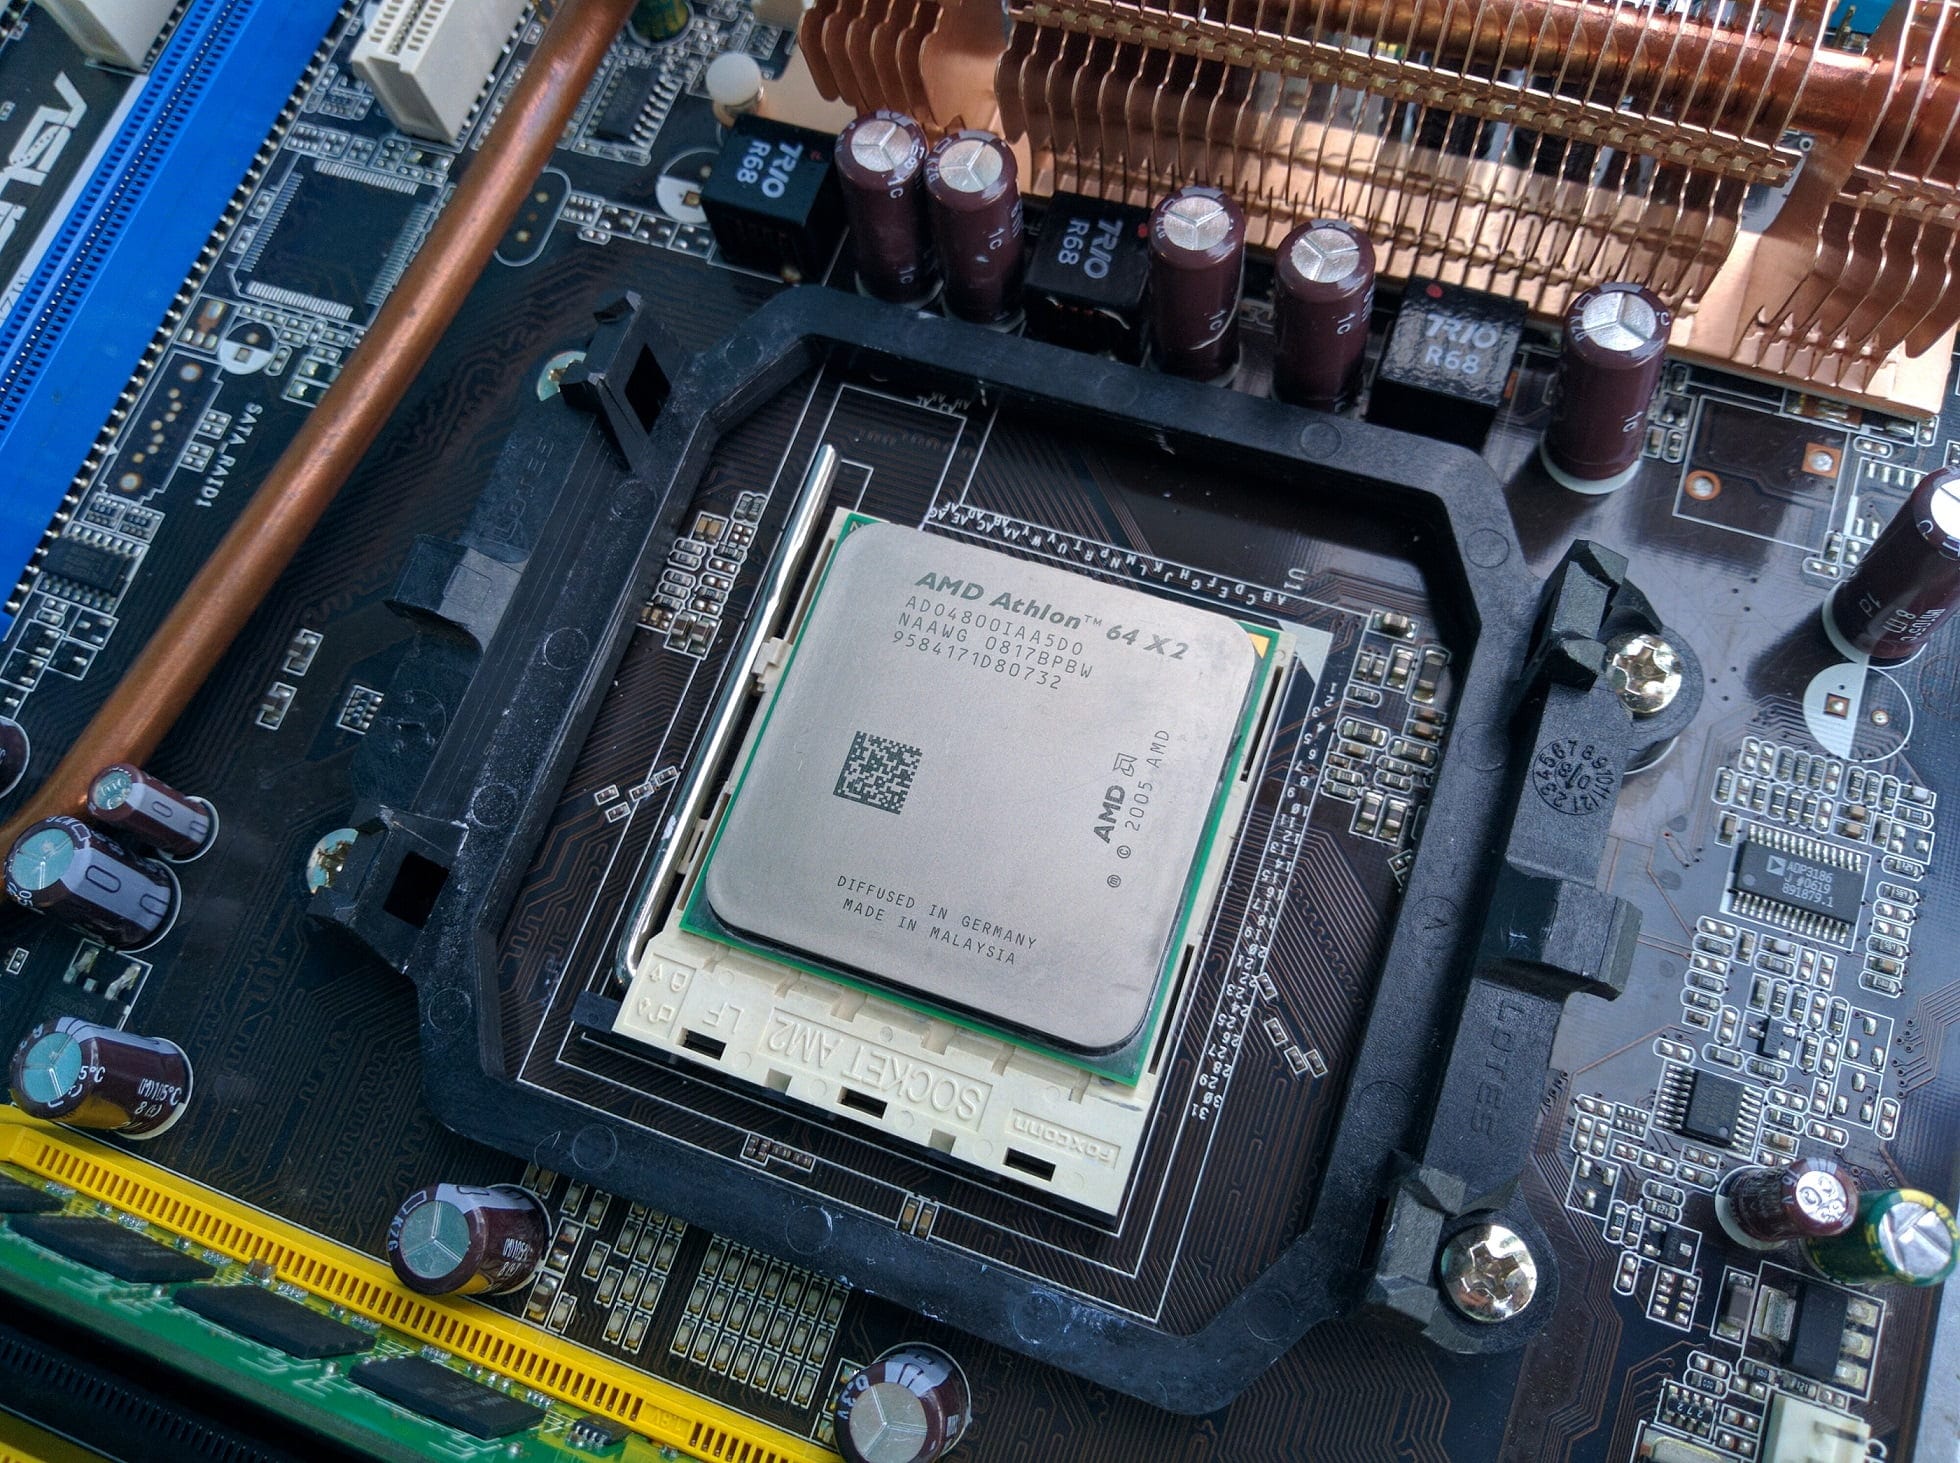
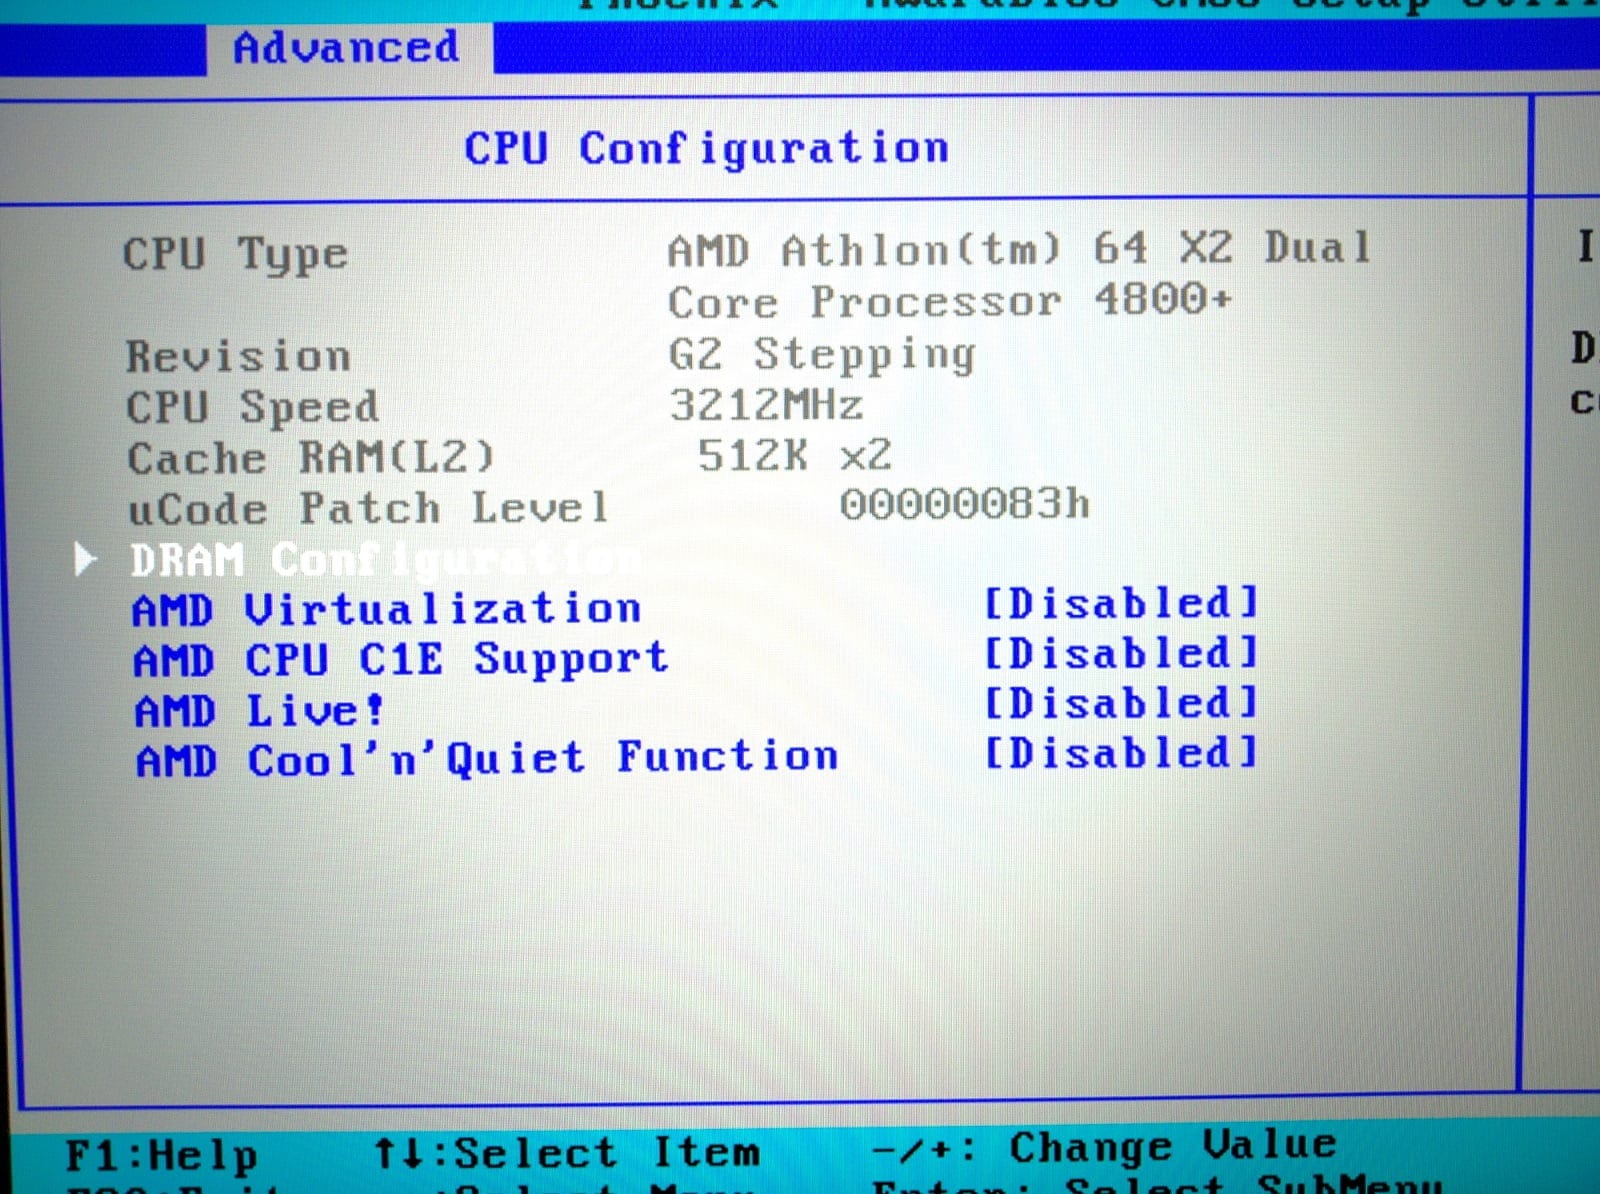
The marking of our test specimen Athlon 64 X2 4800+ is ADO4800IAA5DO NAAWG 0817BPBW from which it is rather difficult to find out anything useful without a network at hand besides the CPU rating and its G2 stepping.
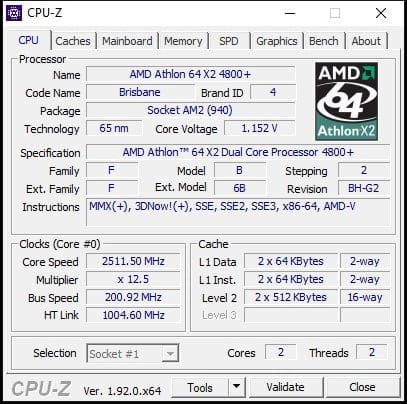
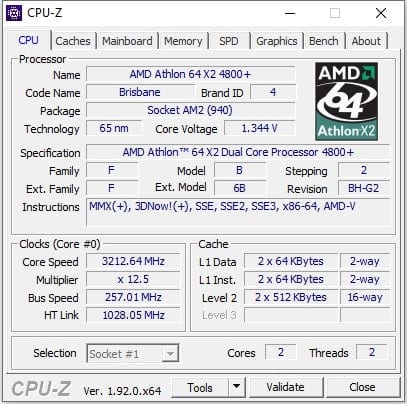
The CPU-z utility gives us much more information: The chip has a relatively low L2 cache per core – only 512KB. Unfortunately, for some reason, CPU-z does not display real voltage. In our case, it is equal to 1.300 volts both according to the monitoring of the motherboard and according to the readings of the multimeter. The base frequency of the processor is 2511MHz, obtained by multiplying the 200MHz bus by a factor of 12.5.
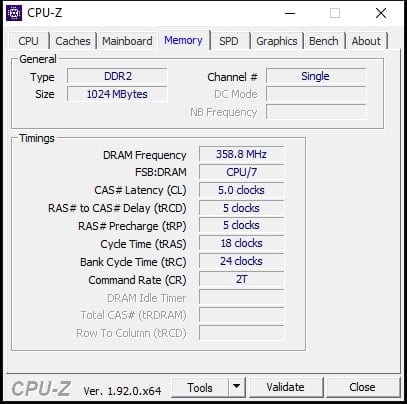
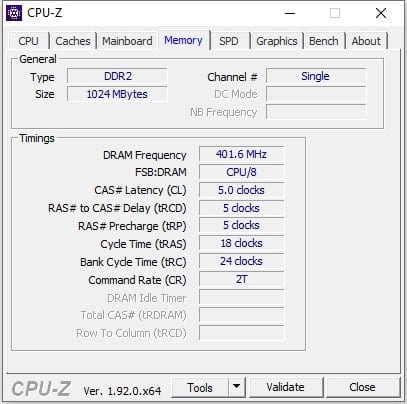
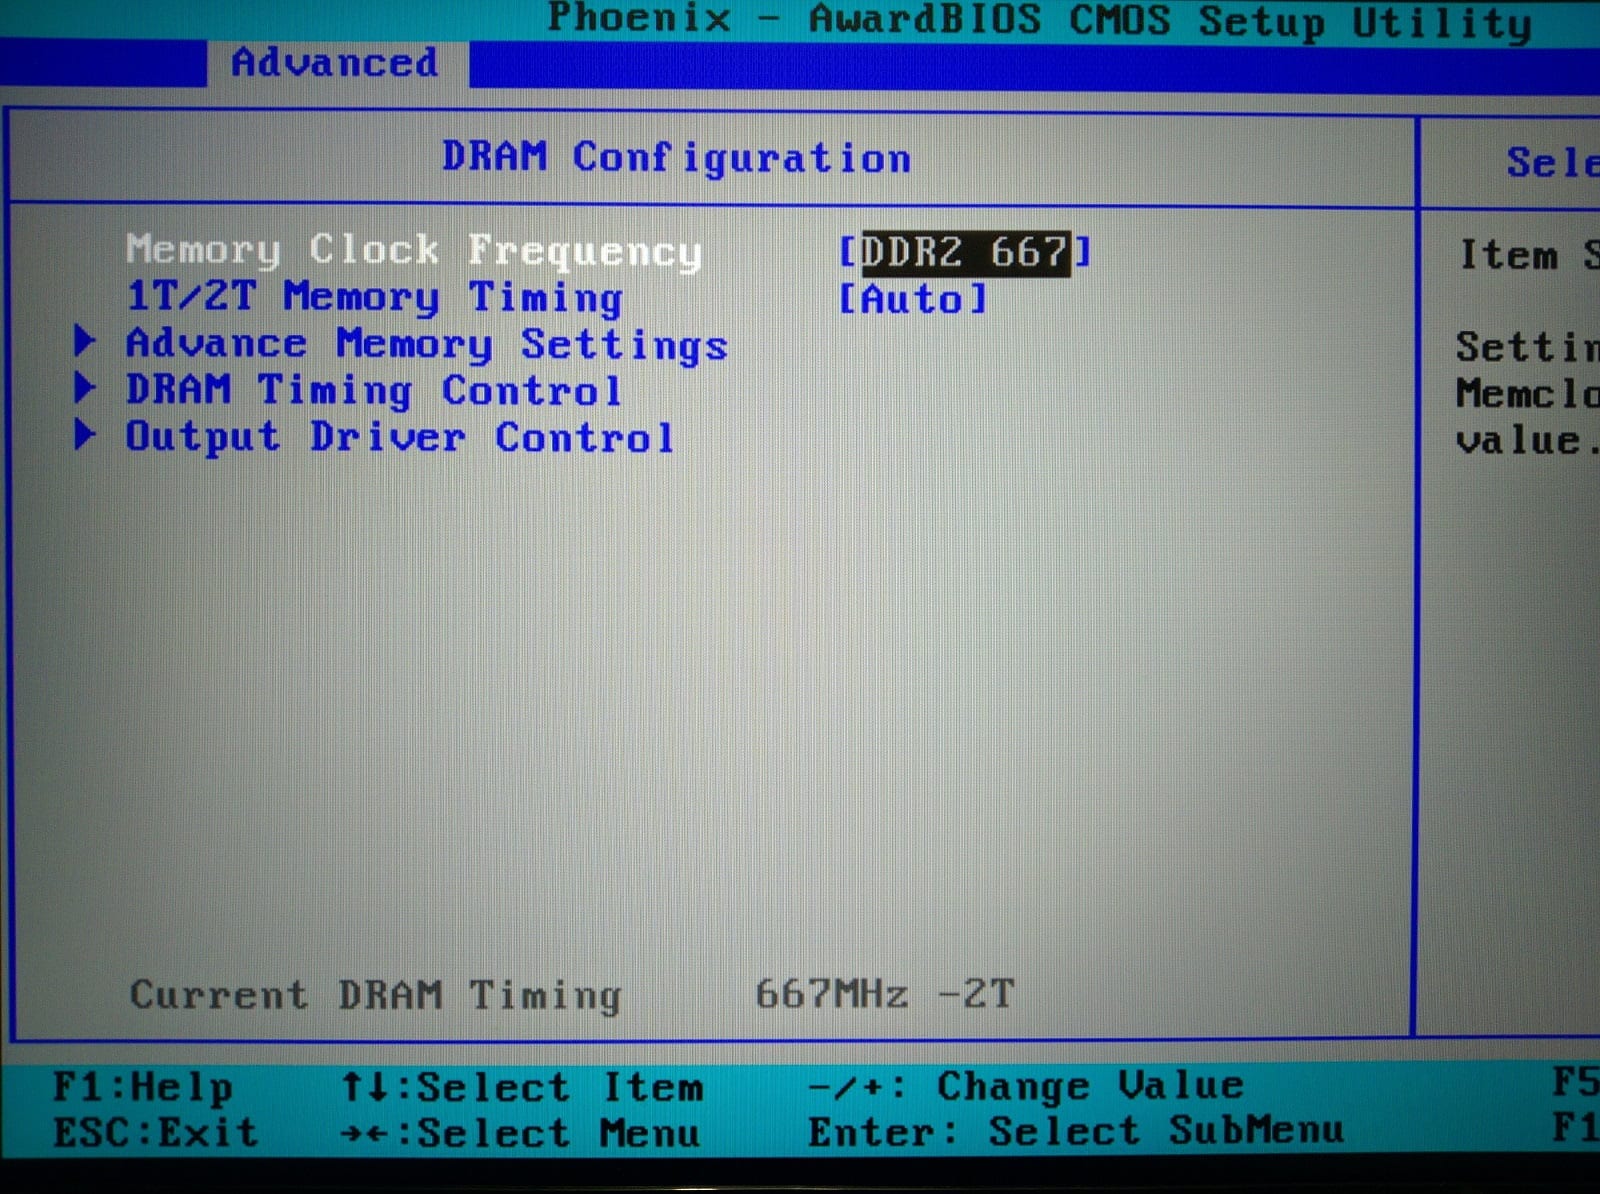
Here lies one of the unpleasant features of the 65nm Brisbane core: because of the fractional multipliers of the reference frequency, the RAM can operate at reduced frequencies. In our case, this is exactly what happened. The multiplier of the Athlon 64 X2 4800+ is 12.5, which ultimately gives us a RAM frequency of only 716MHz instead of the required 800MHz:
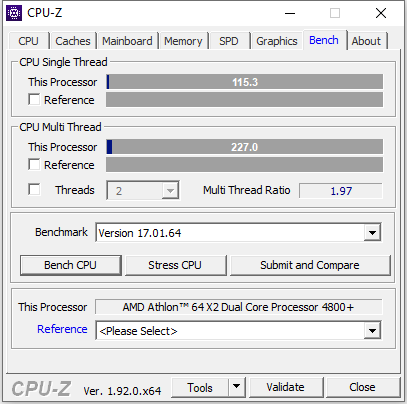
To find out the baseline level of processor performance, I tested it in the built-in CPU-z benchmark at stock frequencies:
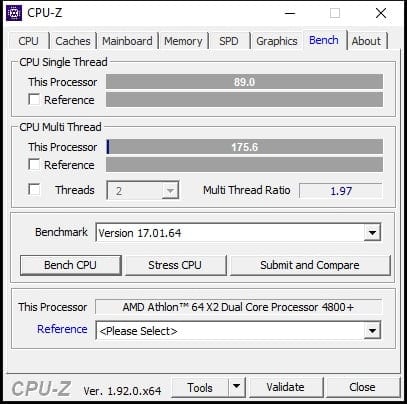
89 points in a single-threaded test and 175 in a multi-threaded test. Not much. Let’s see how much the performance will grow after overclocking.
Test setup
- Motherboard – ASUS M2N-E
- Processor- Athlon 64 X2 4800+
- CPU Cooling – Cooler Master Hyper 212 EVO
- RAM – 1GB DDR2 SK Hynix HYMP512U64CP8-S5
- Video card – ZOTAC GeForce GTX 760 AMP!
- SSD – KINGSTON 120GB SA400S37120G
- Power supply – Chieftec GPS-1250C
- Operating system – Windows 10 with latest updates for May 2020
Overclocking
This overclocking of the Athlon 64 X2 4800+ can be divided into two parts: In the first one I limited myself to a relatively low voltage of 1.400 volts and was able to reach a frequency of 3124 MHz:
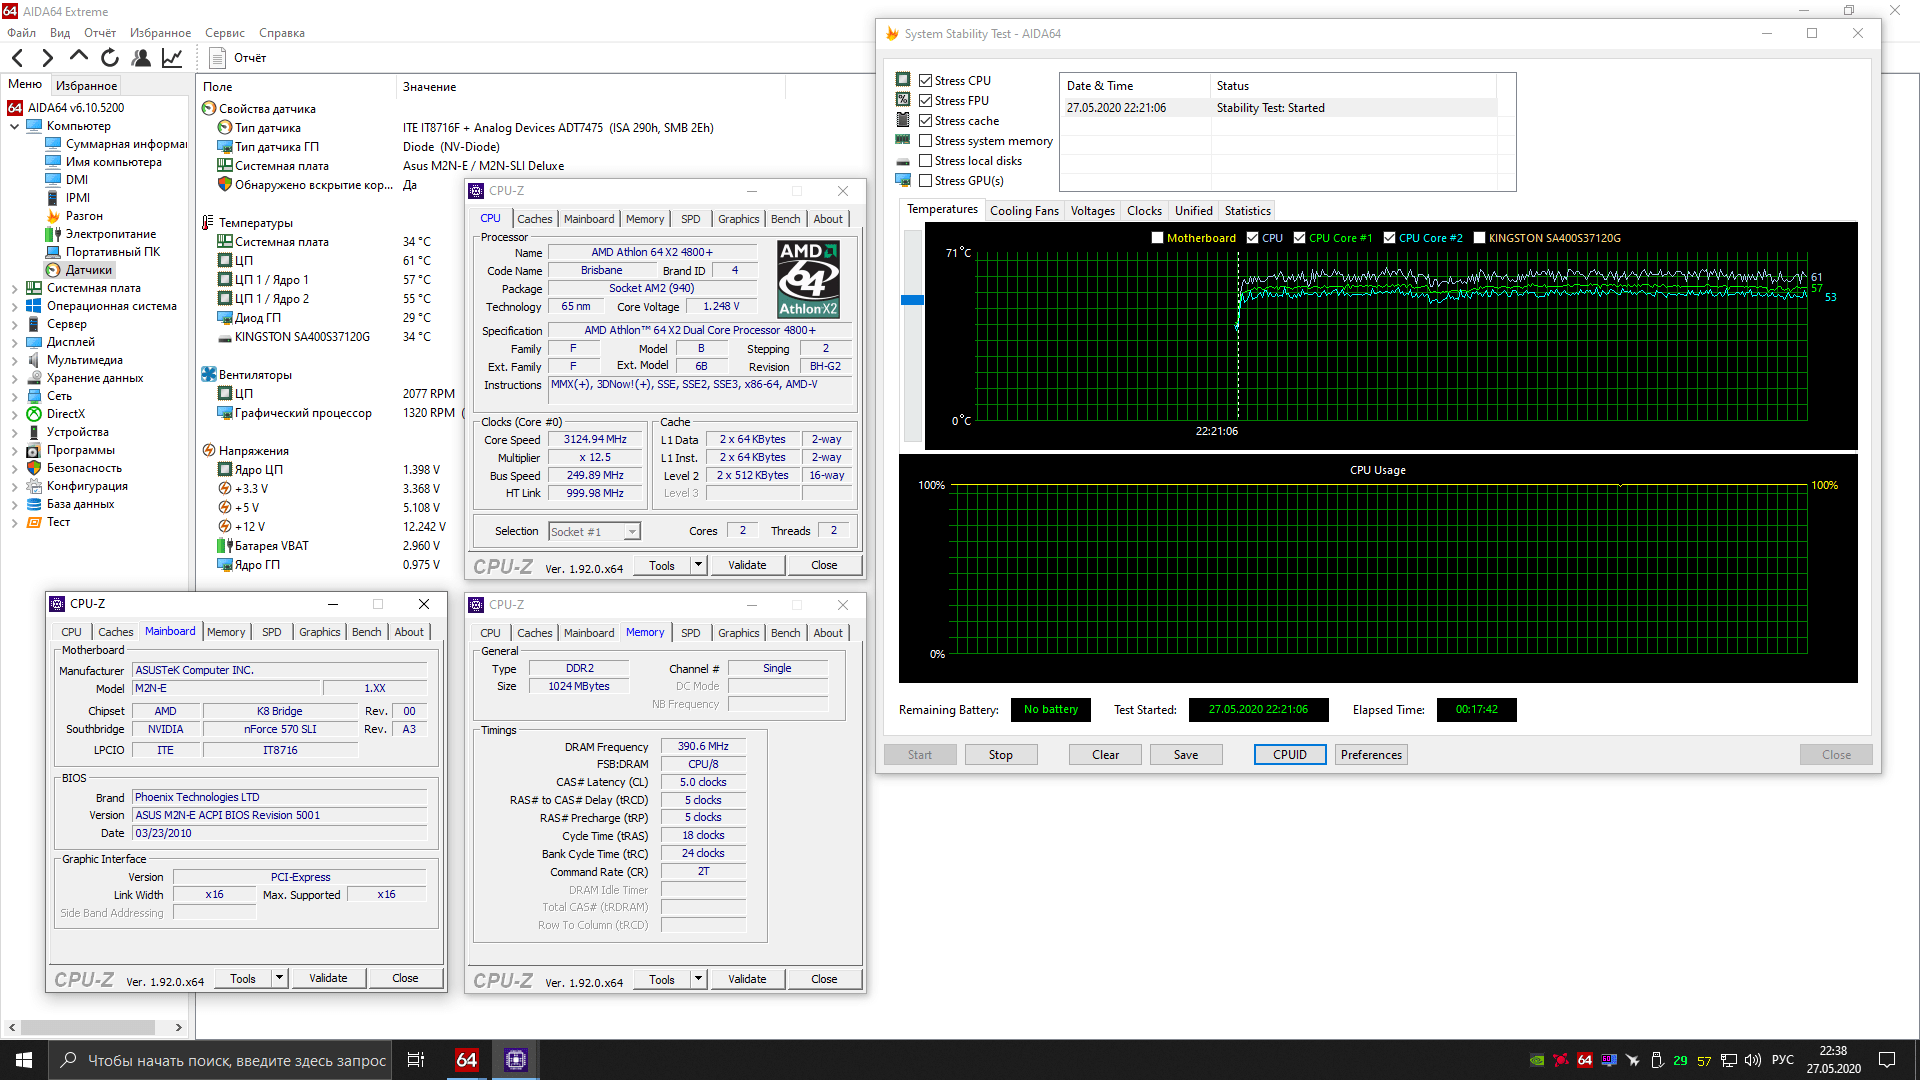
To obtain similar results, a boxed cooler or a cheap analog will suffice.
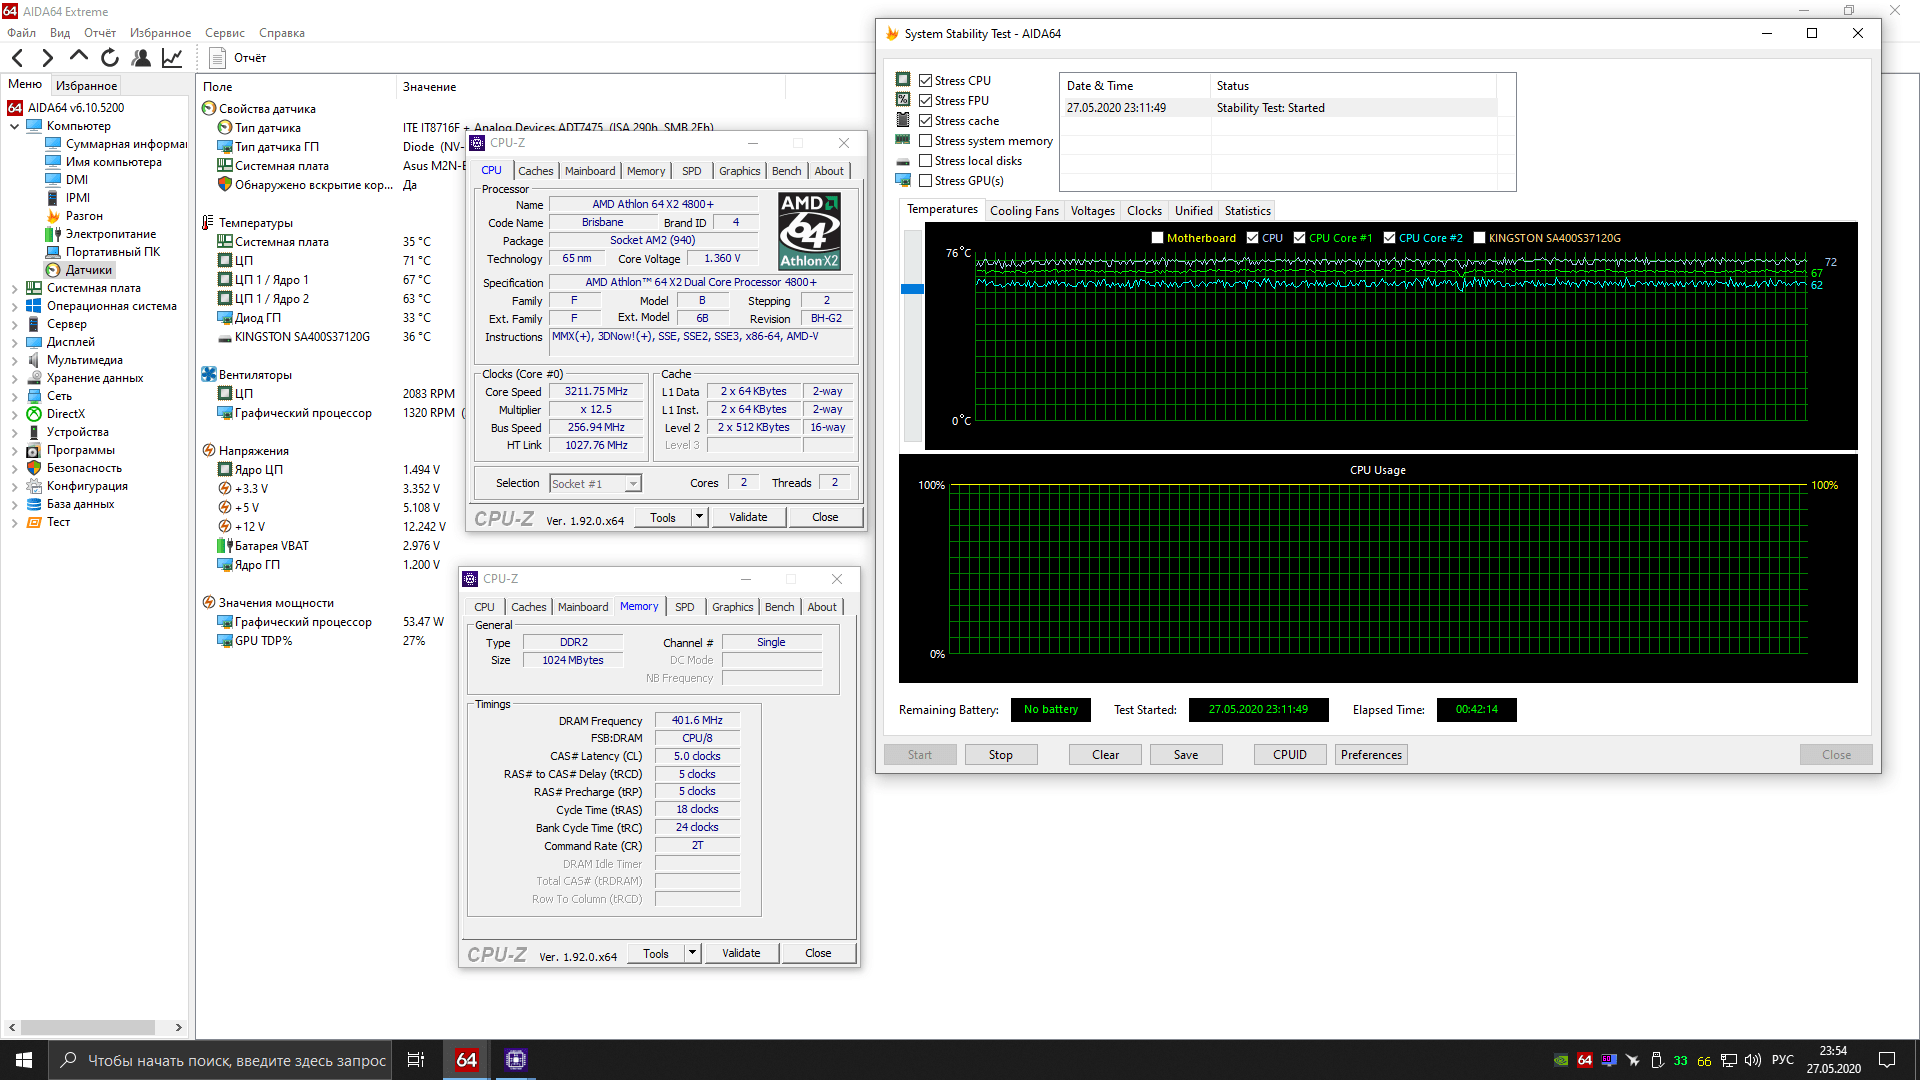
And the second part, in which I set the voltage to 1.500 volts and slightly stepped over the limits of 3200 MHz:
However, it should be understood that box cooling with the hot temper of the old dual-core processor will not cope. Moreover, even under a fairly good CM 212 EVO, the processor warmed up to 73 degrees. Let me remind you that AMD chips of the K8 generation are extremely reluctant to tolerate temperatures above 60 degrees.
By the way, on a boxed cooler, the processor could not pass even a minute of stability test at a frequency of 3200 MHz. After overcoming the temperature of 80 degrees, the system automatically turned off the power.
I’m attaching a screenshot of the 40 minute test in AIDA64:
In addition, below you can see the settings for overclocking the Athlon 64 X2 4800+ chip on the ASUS M2N-E motherboard:
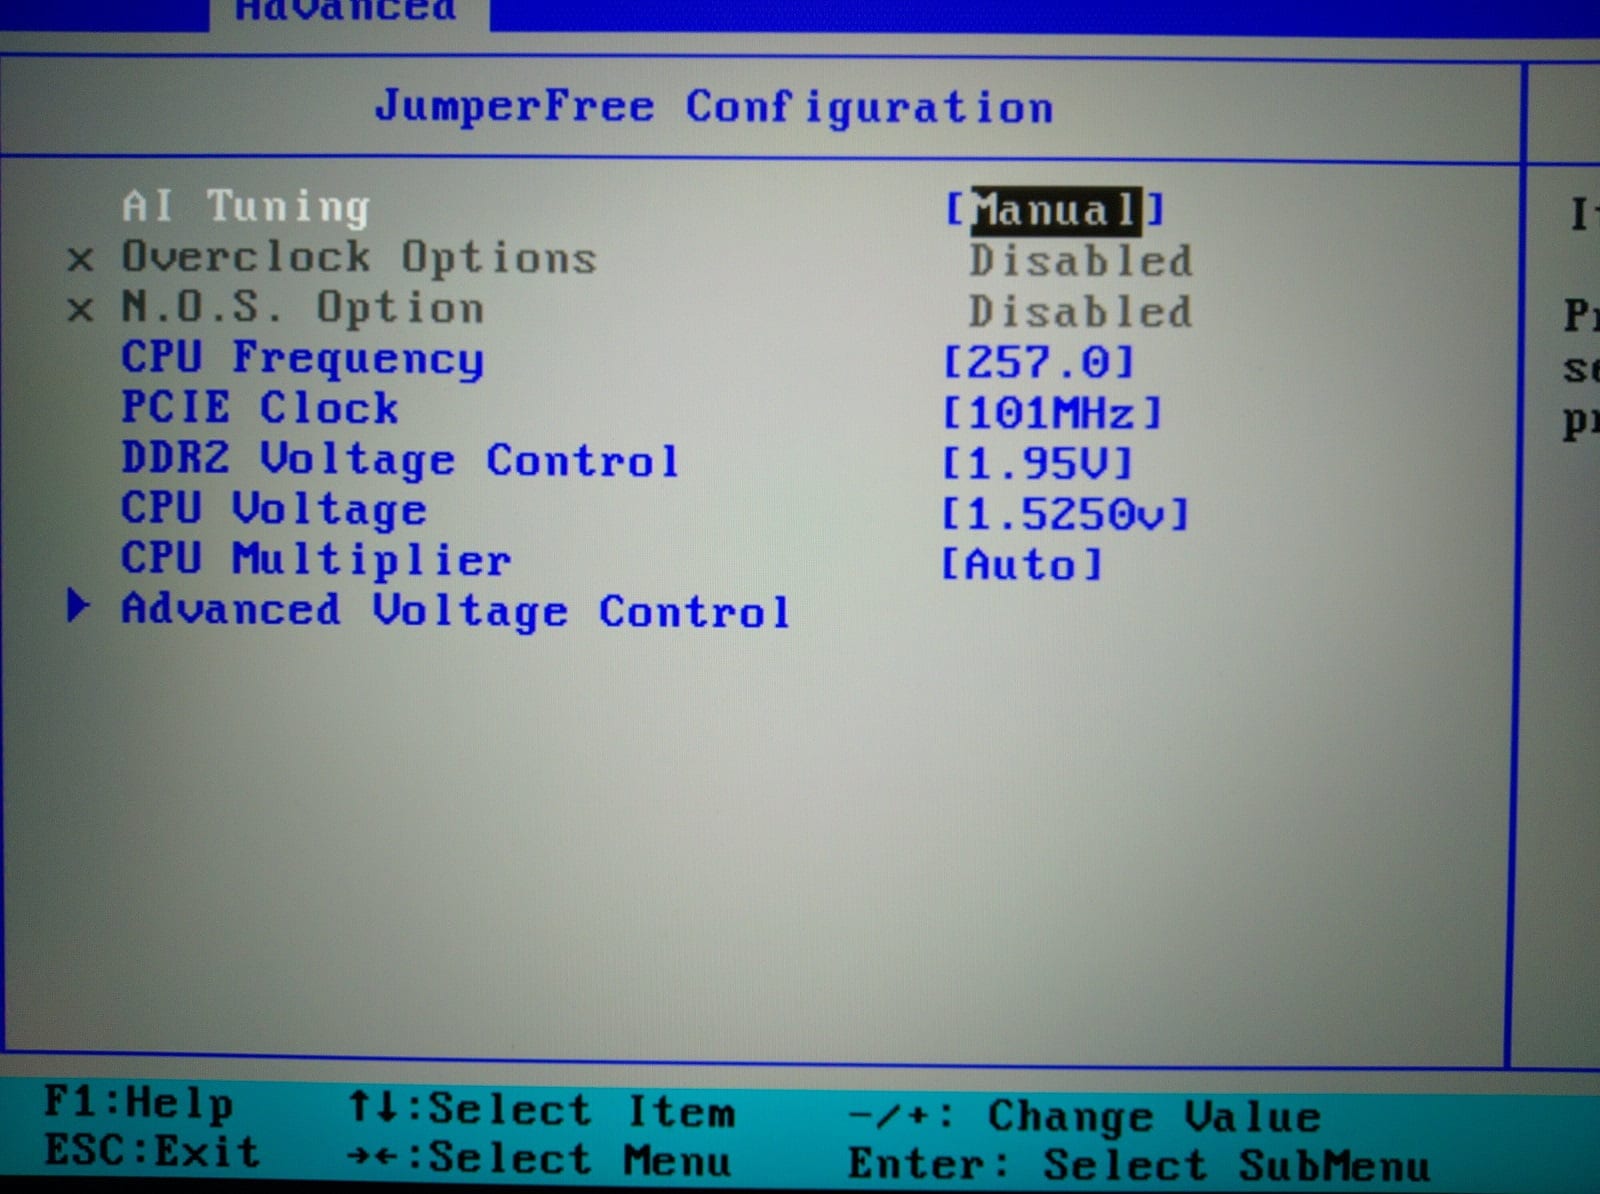
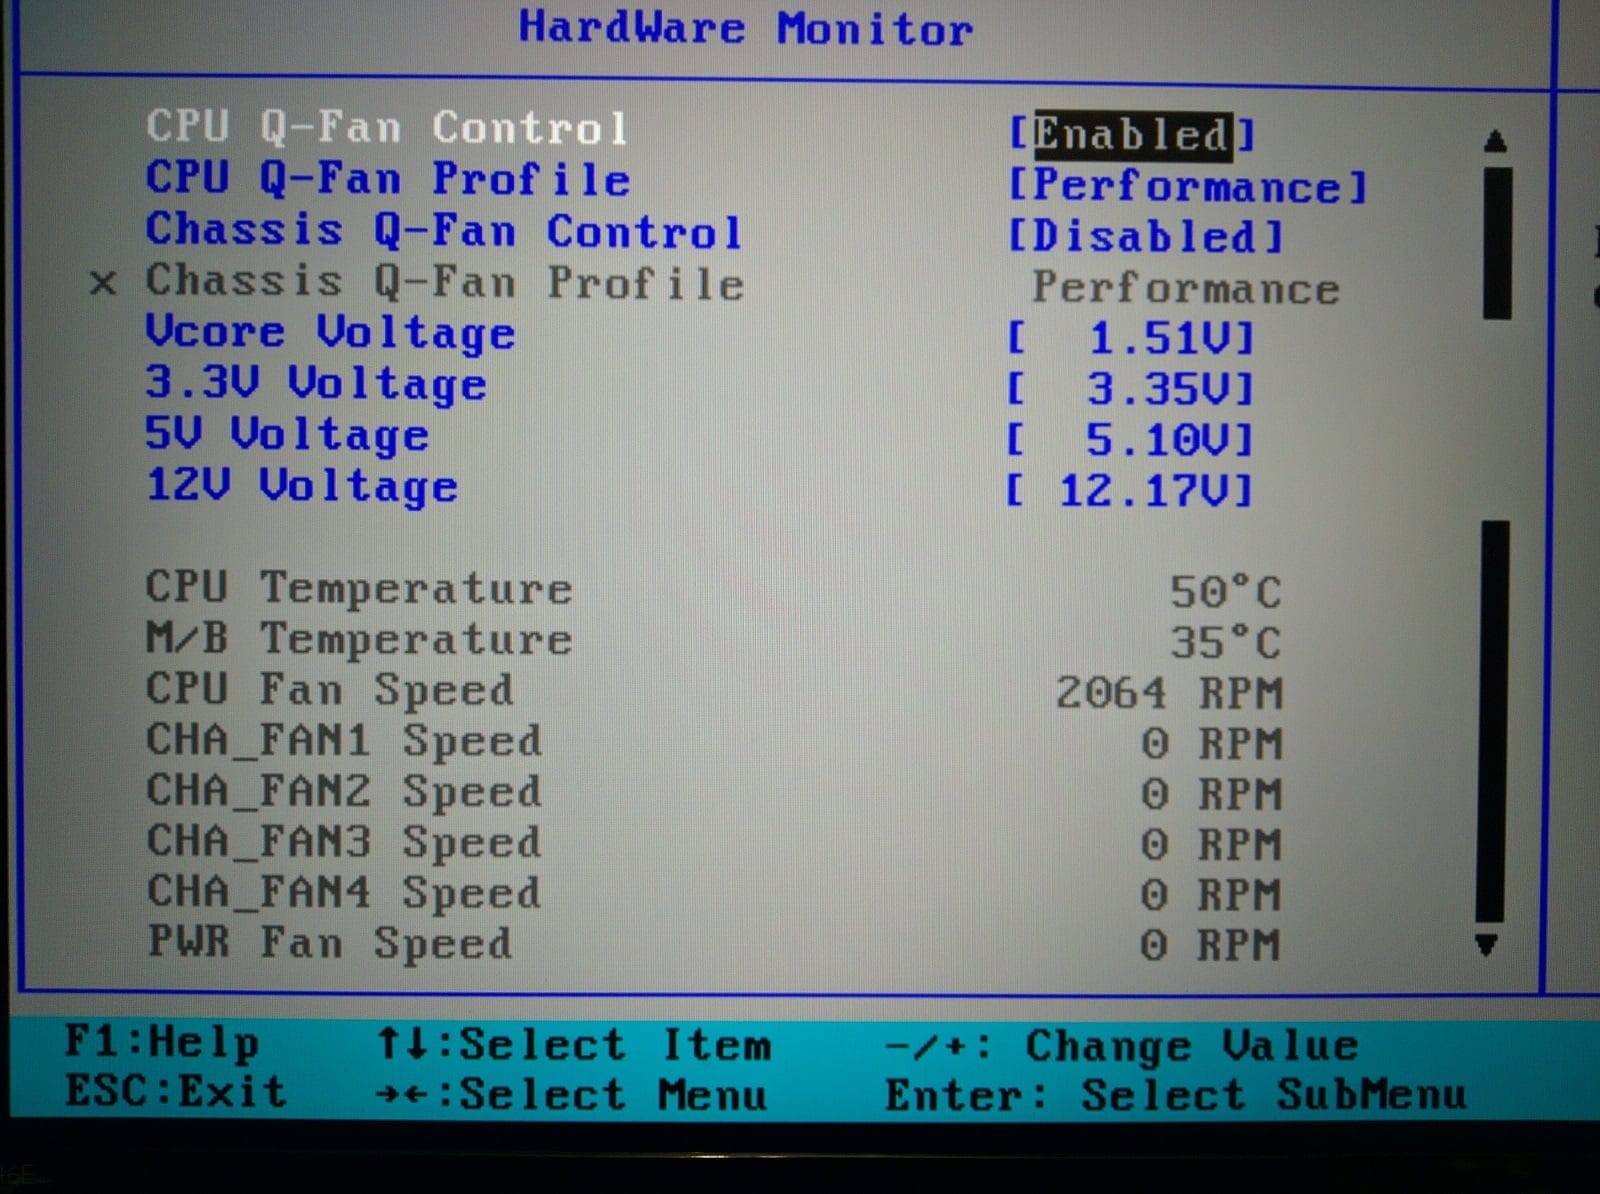
The board is unable to manually raise the voltage to the on-chip memory controller and probably does so automatically (but this is not certain).
Now let’s re-test the processor in the built-in CPU-z benchmark:
And then we will compare these indicators with those obtained earlier at the base frequency:
Athlon 64 X2 4800+@2500МГц Athlon 64 X2 4800+@3200МГц
In a multi-threaded test, the processor speed increased by 22%! Significant productivity gains. Although it completely useless in the realities of 2020.
Conclusion
In general, the frequencies obtained cannot be called anything outstanding. For example, for the Athlon 64 X2 6400+ chip built on the 90nm process technology, these frequencies are completely stock. Nevertheless, if we are not talking about selected processors, then the final result is quite good, especially considering that the test motherboard is poorly suited for extreme overclocking.
ASUS M2N-E
Athlon 64 X2 4800+
Chieftec GPS-1250C
Cooler Master Hyper 212 EVO
GeForce GTX 760
Kingstone
Retro Overclocking